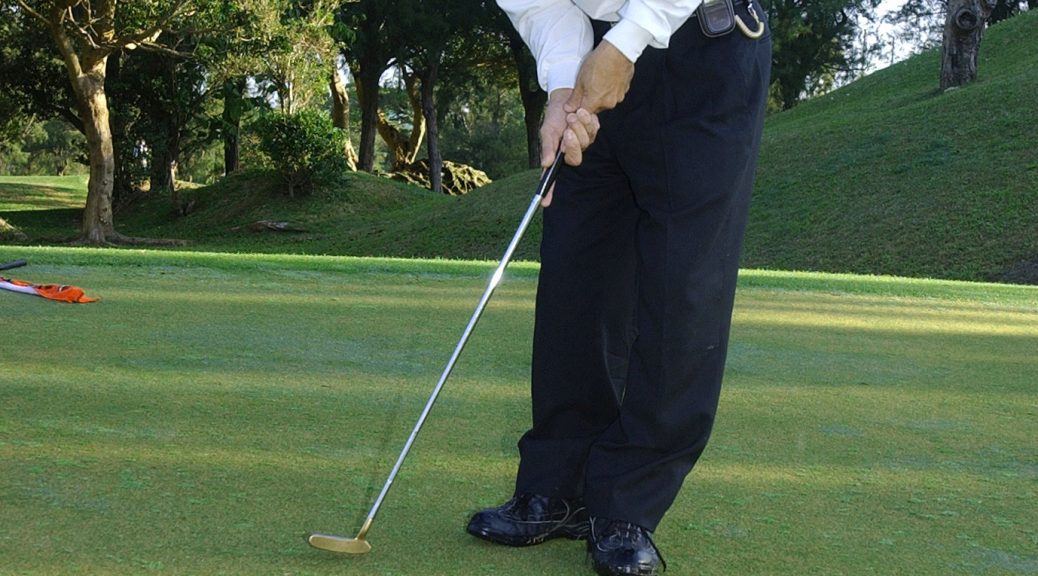
How to Read Greens Like a Pro
The best putters in the world don’t just have great strokes — they read greens expertly. A perfect stroke on the wrong line still misses. It doesn’t matter how silky your tempo is or how perfectly you strike the ball if you’ve aimed at the wrong spot. Green reading is the part of putting that nobody wants to do the work on, and that’s exactly why getting good at it is such an easy way to drop shots off your handicap.
The good news is this: green reading is a skill, not a talent. You don’t need to be born with some magical spatial awareness. You need a system, some deliberate practice, and the willingness to trust what you see instead of second-guessing yourself over the ball. Let’s get into it.
Why Green Reading Matters More Than You Think
Here’s a sobering stat: amateur golfers miss far more putts from the low side of the hole than they do from the high side. Some studies put that figure at over 70%. What that tells you is that most recreational golfers are consistently under-reading break — not over-reading it, under-reading it. You’re probably leaving a lot of putts out to the right (for a right-to-left break) when the ball wants to go left.
Even a 2-3 degree misread on a 15-foot putt means you’re aiming 8-10 inches off target before you even take your stroke. No amount of solid ball-striking fixes that. If you want to make more putts, get better at reading the green first, then worry about your stroke mechanics. The stroke is important — check out our guide to putting fundamentals for the foundation work — but most amateurs have the order backwards.
The Core Variables: What Actually Causes Break
Slope
Gravity is the main engine of break. When a green tilts, the ball rolls toward the lowest available point. The steeper the slope, the more aggressively the ball curves. This sounds obvious until you’re standing over a putt on a slick green that looks flat but has a 2% grade hidden in it — then it feels like sorcery. The key is training your eyes and feet to detect subtle slope that your brain might dismiss as flat.
A useful mental model: imagine pouring a bucket of water from where your ball sits. Where would it flow? That’s your break direction. If water would flow toward the right edge of the cup, your ball will too — assuming you’re not rolling it fast enough to overpower the slope.
Ball Speed and the Speed-Break Relationship
This is the single most misunderstood concept in putting. Your line and your speed are not independent decisions — they’re one decision made together. If you plan to roll the ball firmly (finishing 18-24 inches past the hole if you miss), you play less break. If you’re trying to die the ball into the front edge of the cup, you play more break. Same slope, same putt, different line depending on your intended speed.
Aggressive players who always roll it past the hole can get away with playing tighter lines but need a more reliable stroke. Conservative players who let the ball trickle in need to play more break and be precise with distance control. Neither approach is wrong — pick one and stay consistent with it. Changing strategies mid-round, or worse mid-putt, is a recipe for three-putts.
A quick reference:
| Putt Speed Intention | Relative Break to Play | Risk Profile |
|---|---|---|
| Dying at the hole (front door) | Full break — trust the read | More break but leaves makeable second putt |
| 18″ past if missed | About 75% of total break | Balanced — recommended for most players |
| 24″+ past if missed | 50-60% of total break | Aggressive — good on slow greens, risky on fast |
Green Speed (Stimp)
The faster the greens, the more break you need to play. On a 9-Stimp green (relatively slow), a putt with 1 inch of slope over 15 feet might break 4 inches. That same putt on a 13-Stimp green at Augusta-style speeds might break 10-12 inches. Fast greens amplify every fraction of tilt. If you’re playing a course with faster greens than you’re used to, your first few holes should be an adjustment period — read more break than feels comfortable and let your results teach you the calibration.
Distance
Longer putts have more time on the green, so gravity has more time to work on the ball. A 30-footer on the same slope as a 10-footer will break roughly three times as much. Don’t just scale your break estimate by distance in a linear way — on longer putts the ball is also slowing down toward the end, which means it picks up even more break in the final 6-8 feet. Long putts almost always break more than first-time players expect.
The Green Reading Process: A Step-by-Step System
Good green readers aren’t just blessed with great eyes — they follow a repeatable process on every single putt. Here’s the one that works.
Step 1: Start Reading While You Walk
As soon as you’re inside 30 yards of the green, start gathering data. Look at the overall contour of the land. Where are the high points? Where would water drain? Notice the general tilt of the green complex before you ever get to your ball. By the time you’re marking your ball, you should already have a rough idea of the dominant slope direction.
Pay attention to the surroundings too — mountains, elevated fairways, nearby ponds. Greens are often built to drain toward the water hazards and away from elevated terrain. Course architects are consistent in their drainage logic.
Step 2: Survey from Behind the Ball
Stand 6-8 feet directly behind your ball, crouching down so your eyes are closer to ground level. Look at the entire path from ball to hole. You’re trying to read two things simultaneously: the overall direction of break, and the severity of it. Crouch low — this gives you a much better view of subtle undulations that standing upright hides.
Notice where the ball would want to start and where it would finish if released with medium pace. This mental visualization — actually “seeing” the ball’s path in your mind — is the hallmark of elite green readers. Don’t just look at the green; picture the putt rolling out on it.
Step 3: Check from the Low Side
Walk to the low side of your putt — the side toward which the ball will break. From here you can see the elevation change much more clearly. The slope that looks subtle from behind the ball often looks dramatic from the low side, and vice versa. This cross-check is how you confirm or adjust your initial read. You don’t need to spend five minutes here — 15-20 seconds, look, confirm, move on.
Step 4: Pay Extra Attention to the Last 3 Feet
This is where most amateurs lose putts they’ve read correctly everywhere else. The ball is moving at its slowest in the final 3 feet, which means gravity has maximum influence at that point. A putt that seems to be tracking perfectly can still slide off the edge if there’s a subtle tilt near the hole that you didn’t account for.
Get low and look specifically at the ground from about 3 feet out to the cup. Look at the cup itself — if one edge is more worn than the other, that worn edge usually points toward the dominant grain direction, which can also hint at how putts finish there.
Step 5: Pick a Spot and Commit
Once you’ve done your read, pick a specific target. Not a vague “that area” — pick a blade of grass, a discoloration, a spot you can actually aim at. Some players like to pick a spot 1-2 feet in front of the ball. Others aim at a point at the apex of the break. Whatever your system, make it concrete and then commit to it completely. Doubt over the ball will ruin your stroke and your line simultaneously.
Deep Dive: Reading Grain
Slope is the main act, but on Bermuda grass especially, grain is a co-star that you ignore at your peril. Grain refers to the direction the grass blades grow, and it can meaningfully affect both the speed of your putt and the direction it rolls.
Identifying Grain Direction
The shine test: Look at the grass between your ball and the hole. If it looks bright and shiny, the grain is growing away from you — the putt is “down grain” and will roll faster than the slope suggests. If it looks dull and dark, the grain is growing toward you — that’s “into grain” and the putt will roll slower and more sluggishly.
The cup edge: Look at the edges of the cup. The side where the grass appears more worn or frayed is typically the side the grain is growing toward. On Bermuda greens this is often remarkably consistent across the whole hole.
Environmental cues: Bermuda grain tends to grow toward the setting sun — so on a late afternoon round, grain often tilts west. It also tends to grow toward the nearest water source. Drainage patterns are your friend here.
How Grain Affects Your Read
Down grain (putting with the grain): The putt is faster. If you’re on a fast green, subtract a little pace — you need less backswing than normal. Grain running in the same direction as your slope amplifies the break. Running against the slope, grain can partially cancel the break.
Into grain (putting against the grain): The putt is slower, sometimes noticeably so. You’ll need more pace, and that extra pace will reduce the break. Factor this into how far offline you aim.
Cross grain: This is the sneaky one. If grain runs left-to-right across your putt and slope also breaks left-to-right, you’re in trouble if you under-read it — both forces push the ball the same way. If grain runs against your slope break, it’s a partially canceling effect and the putt plays “truer” than it looks.
Bent grass — the dominant grass type on most northern and inland courses — has minimal grain influence. If you’re playing in Florida, Texas, Hawaii, or on a links course, grain is a primary concern. On a bentgrass course in Minnesota in August, you can largely ignore it.
AimPoint: The Method That Changed Tour Green Reading
AimPoint Express is the system you see tour pros using when they crouch behind the ball, face the hole, and hold up fingers. It’s not superstition — it’s a surprisingly effective method for quantifying break. Here’s a simplified version you can actually use on the course.
The Core Concept
AimPoint converts your body’s proprioceptive sense of slope into a usable aim point. Your feet and legs can feel subtle tilts that your eyes might miss or your brain might rationalize away. The method forces you to trust your physical sensation rather than your visual interpretation.
How to Do It (Simplified)
- Stand at the midpoint of your putt — roughly halfway between ball and hole — with feet shoulder-width apart, perpendicular to the line of the putt.
- Feel which foot is lower. Close your eyes briefly if it helps. That’s the break direction.
- Rate the slope 1 through 5. Level ground is a 0. Barely perceptible tilt is a 1. A clearly obvious slope is a 3. If you’d struggle to stand still, you’re at a 4 or 5. Most putts on most courses fall in the 1-3 range.
- Hold up the corresponding number of fingers at arm’s length, with your thumb edge aligned to the center of the hole.
- The far edge of your fingers is your aim point. That’s where you start the ball.
The finger-width method scales with distance — your arm’s length creates a consistent angular measurement. A 1-finger aim on a 10-foot putt is a different physical offset than a 1-finger aim on a 30-foot putt, which is exactly right, because longer putts break more.
AimPoint isn’t perfect and it takes calibration — your first few rounds using it will feel uncertain. But stick with it and you’ll find your reads become more systematic and less affected by optical illusions. Some greens are designed to look like they break one way when they actually break the other. AimPoint’s reliance on feel rather than sight protects you from those traps.
Environmental Factors: Wind and Moisture
Wind
Yes, wind affects putts. On very long putts (40+ feet), a 20 mph wind can push a ball 2-3 inches off line. Most recreational golfers ignore this entirely. You don’t need to obsess over it, but on exposed greens with long putts in windy conditions, factor in about half-a-ball-width of wind drift for every 10 feet of putt in a 15+ mph crosswind. Into the wind, the ball slows faster — play a little more break because the ball will be losing speed sooner. Downwind, the opposite: the ball stays faster, plays a tighter line.
Morning Dew and Moisture
Wet greens are slower greens. A dewy morning round means you need more pace on everything, which means your putts will break less than usual. This trips up golfers who played the same course the afternoon before on fast, dry surfaces. Morning rounds, especially early tee times, require more aggressive stroke pace and tighter line reads.
Aeration season is another wrinkle. Freshly aerated greens play dramatically slower and the ball can get knocked off line by the holes. During aeration recovery, read less break and trust your stroke direction over your line read. There’s only so much you can account for when the green surface is pockmarked.
Reading Complex and Multi-Break Putts
Straightforward left-to-right or right-to-left putts are one thing. Double-breaking putts — where the ball starts one way then finishes another — are where green reading gets genuinely difficult.
Divide and Conquer
Break the putt into two or three segments. Read each segment separately, then prioritize the section nearest the hole, since that’s where the ball is moving slowest and is therefore most influenced by slope and grain. The last 5 feet of a 25-foot double-breaker probably matters more than the first 10 feet.
Find the Transition Point
On a double-breaker, there’s a point where the ball crosses from one slope to another. Find it. That transition point is the “false flat” that fools golfers into thinking the putt is simple. Your aim needs to account for where the ball will be when it hits that transition and how it will redirect.
Uphill vs. Downhill
Uphill: Break less than it looks. You need a firmer pace to get the ball to the hole, and firmer pace means less time for gravity to deflect the ball. Uphill putts are the most makeable putts on a golf course — be aggressive. Don’t die it short.
Downhill: Break more than it looks, often significantly more. Your pace will naturally be softer to control distance, and softer pace means the ball is spending more time under the influence of gravity. Downhill putts on fast greens are the hardest putts in golf. Take your time, trust the read, and commit to a soft touch.
Common Mistakes That Cost You Strokes
Mistake 1: Reading from Only One Angle
Standing behind the ball and calling it a day is not a green read — it’s a guess. A single perspective gives you one slice of the information available. You need at least two views, ideally the behind-ball view and the low-side view, to triangulate what the putt is actually doing. Pros sometimes take three or four looks. You don’t need to be that thorough on a 4-footer, but on anything 10 feet and out, invest in at least two angles.
Mistake 2: Under-Reading Break (The Consistent Amateur Problem)
The “amateur side” of the hole is the low side — where the ball finishes when you’ve under-read the break. Research consistently shows that amateur golfers leave the vast majority of missed putts on the low side. The reason is psychological: playing more break feels risky. We’re hardwired to aim at the thing we want to hit, and the hole is right there. Train yourself to aim past the hole. When in doubt, add more break.
Mistake 3: Not Connecting Speed to Line
You cannot read the line without deciding the speed. These decisions are inseparable. “I’ll figure out the speed when I’m over the ball” is not a system — it’s a recipe for inconsistency. Decide on your intended pace during your read, then pick the line that matches that pace. Walk into your stance with both decisions already locked in.
Mistake 4: Changing Your Mind Over the Ball
You’ve read the putt. You’re standing over it. You look at the hole one more time and suddenly the break looks totally different. This happens to everyone. The correct response is to step away, reset your read, then re-commit and go. The worst response is to “average” between your two reads and aim somewhere in the middle. Uncommitted putts almost never go in.
Mistake 5: Ignoring the First Couple of Feet
Most golfers know to read near the hole carefully. Fewer think carefully about the first 2-3 feet after the ball. If the ground near your ball is tilted, that affects the initial direction and pace of the roll before the ball even gets to the “interesting” part of the putt. A slightly uphill start might mean you need a touch more pace; a subtle tilt at the ball can push your start line before you’ve had a chance to steer.
Mistake 6: Misreading Optical Illusions
Courses are sometimes designed to fool your eyes. A putt that runs toward a bunker or water hazard looks like it breaks toward the hazard, even when the actual ground does the opposite. Elevated surroundings on one side of the green make that side look higher than it is. When something looks wrong, trust your feet (AimPoint-style) over your eyes.
Drills to Practice Green Reading
Drill 1: The Drainage Map
Before you start your next practice session, walk the entire practice green without a putter. Your only job is to map where the high and low points are. Find the places where water would pool and where it would drain off. Sketch it mentally. Then hit putts from 10-15 different spots and see how well your map predicted the break. Over time, you’ll start seeing green contours in seconds that used to take you several minutes — and some you missed entirely.
Drill 2: Two-Ball Speed-Break Drill
Pick a 15-foot putt with clear break. Hit two balls to the same hole — one aggressive (plan to go 18-24″ past), one conservative (try to die it in the front door). Notice how different the break is on each ball. This isn’t just academic — it trains your brain to always connect speed with line as one unified decision. Do this for 10-15 minutes and you’ll feel the relationship become intuitive.
Drill 3: The Gate Drill for Start Line
Place two tees 3-4 inches apart about 12 inches in front of your ball, creating a “gate” your ball must roll through. Pick a 10-foot putt with a clear break. Your job is to start the ball through the gate at the exact angle needed to hit the intended line. This drill removes the outcome (whether the ball goes in) from the equation and lets you focus purely on where the ball starts — which is all you can control. A putting mat at home works just as well for this; see our picks for the best golf putting mats if you want to work on this indoors.
Drill 4: The AimPoint Calibration Drill
Find a putt you know is a consistent 2-inch break (use string or measure with tape to verify). Practice the AimPoint foot-feel process on it until your finger read consistently gives you the right aim point. Then find a 4-inch breaker and repeat. The goal is to calibrate what a “1” feels like versus a “2” versus a “3” on the scale. This takes time, but after a dozen sessions you’ll have a reliable internal reference that stays with you on course.
Drill 5: Watch Before You Walk
This one costs you nothing. When playing with others, before you walk to your ball, stop and watch their putts all the way to the end. Note where the ball broke. Note where it finished relative to the hole. Use their results as free data for your read. Most golfers stand behind their own ball thinking about their own putt while partners are essentially giving them a live lesson. Pay attention and steal that information.
Tools That Help
Marking Your Ball
Drawing a line on your golf ball before each hole and aligning it to your intended start line is one of the best things you can do for your putting. Once you’ve read the putt and committed to a line, mark the ball to that exact start direction. If you’re set up over the ball and the line on the ball looks wrong, it’s a signal your alignment is off — not a reason to change your read at the last second. This process forces you to commit your read into a physical object before you even stand over the putt.
Putter Alignment Aids
The alignment aids on your putter matter more than most golfers realize. A clean, simple sightline is all you need — one that points where the face is aimed without visual clutter. If you’re in the market for a putter upgrade, something like the Scotty Cameron Special Select Newport 2 offers a classic single sightline that gives you an unambiguous aim reference without overcomplicating your visual setup. Trust your putter to show you where you’re aimed; if the sightline is confusing, it’s fighting your reads instead of confirming them.
Green Reading Books and Apps
Tour players use detailed green reading books — topographic maps of every hole that show slope direction, severity, and key break points. These are now available for many courses through apps like Caddie AI or Golfshot. They’re most useful for courses you play regularly, where you can build on a map over multiple rounds. Treat them as a starting point, not a substitute for your own reads. The map tells you where the slope is; only your eyes and feet can tell you how it plays that specific day in those specific conditions.
When to See a Pro
Green reading is a skill you can mostly self-teach with deliberate practice. But there are a few situations where a session with a PGA professional or a putting coach pays off faster than going it alone.
You consistently miss on the same side: If your misses are systematically all low or all high, something in your read process has a consistent bias. A coach can identify whether it’s a visual perception issue, an aim problem, or a speed control issue. Each requires a different fix.
You can’t stop changing your mind over the ball: This is often a mental/process issue as much as a reading issue. A putting coach can give you a pre-putt routine that commits you to your read before you step into your stance, which removes the opportunity to second-guess at the last second.
AimPoint isn’t clicking: AimPoint Express is ideally learned in a certified workshop, not from YouTube. The in-person calibration session where an instructor verifies your slope ratings against known grades is genuinely valuable. If you’ve tried the method on your own and it’s making your reads worse rather than better, find an AimPoint-certified instructor for even a single session.
You’re playing to a 5-handicap or better and still three-putting regularly: At that level, green reading is almost certainly the limiting factor if your stroke is sound. A proper putting lesson focused on reading process (not stroke mechanics) can be eye-opening. Better golfers often have deeply ingrained read habits that are wrong — habits that felt right enough for years but become the ceiling at a certain level.
Developing Feel Over Time
There’s no shortcut around logged hours on the practice green. But you can make those hours count more by being intentional. After every practice putt, don’t just watch where it goes — analyze it. If it missed, ask: was it a mis-read or a mishit? If it broke differently than you expected, ask: what did I miss in my read? Keeping a simple mental (or written) log of where your reads are wrong most often is how you identify your specific blind spots.
Play different courses whenever you can. Courses with significant elevation changes teach you uphill/downhill reading. Links courses teach you to read wind and grain simultaneously. Mountain courses force you to handle severe breaks. Every new green style expands your reference library.
And watch better players. Not just to see where their ball goes — watch how they read. How long do they spend behind the ball? Do they crouch? Do they walk to the low side? Do they use AimPoint? Watching a scratch golfer’s pre-putt process is worth more than watching their stroke.
Final Thoughts
Reading greens well isn’t glamorous. It doesn’t have the visual appeal of a 300-yard drive or a flighted iron. But it’s arguably where the most strokes are available for the average golfer, sitting right there on the table, uncollected.
The golfers who putt well share a few traits: they have a system, they gather information from multiple angles, they connect speed and line as one decision, and they commit completely before they pull the trigger. None of that requires natural talent. It requires intention and repetition.
Play more break than feels comfortable. Trust your feet on severe slopes. Watch the putt all the way to the cup and learn from every result. Build that visual library one round at a time.
Your three-putt count isn’t inevitable — it’s a reflection of your current reading habits. Change the habits, change the number.
For the foundation work that makes green reading matter — the grip, stance, and stroke mechanics that give you a consistent roll — start with our deep-dive into putting fundamentals. Because no matter how well you read the green, it only pays off when the ball rolls end-over-end true from the moment it leaves your putter face.